 |
| Folders by Colleen Galvin, on Flickr Source; https://www.flickr.com/photos/col233/7974661195 |
Here is my Moodle folder resource.
 |
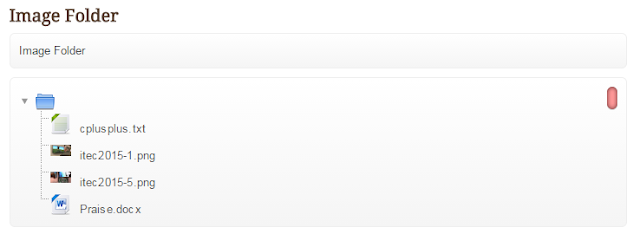
| Figure 1. A normal-looking folder containing 2 image files, 1 text file and 1 Ms Word file. Nothing out of the ordinary here.... |
 |
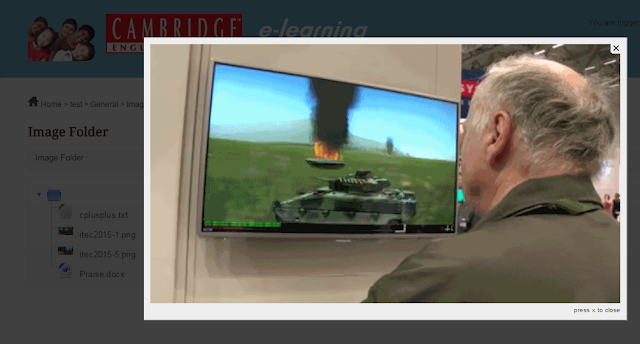
| Figure 2. What happens when the file itec2015-1.png is clicked. Whoa! It's a lightbox image effect. Click the 'x' to close. |
 |
| Figure 3. The user has just clicked the itec2015-2.png file. Okay, so it opens nicely on-screen . How can user download the image? Well, just right-click the mouse on the image! |
How can this be useful for your classroom? Well besides using the excellent Lightbox Gallery module, you could also use the Moodle Folder resource as an image repository. When the user clicks on the image file, he or she can instantly view the image without having to download the file and then use an Image Viewer to view the image. So in my humble opinion, it's all about convenience.
How did I achieve this effect? Listen closely and I'll tell you the secret.
Firstly, edit the file /mod/folder/renderer.php as per figure 4 below:
 |
| Figure 4. insert the whole section outlined in yellow and comment off some of the original code. |
Here's that code in the yellow section.
/* Added by Frankie on May 6th*/
$filename = html_writer::tag('span', $image, array('class' => 'fp-icon')).
html_writer::tag('span', $filename, array('class' => 'fp-filename'));
$filename = html_writer::tag('span',
html_writer::link_lightbox($url->out(false, array('forcedownload' => 1)), $filename),
array('class' => 'fp-filename-icon'));
} else {
$image = $this->output->pix_icon(file_file_icon($file, 24), $filename, 'moodle');
$filename = html_writer::tag('span', $image, array('class' => 'fp-icon')).
html_writer::tag('span', $filename, array('class' => 'fp-filename'));
$filename = html_writer::tag('span',
html_writer::link($url->out(false, array('forcedownload' => 0)), $filename),
array('class' => 'fp-filename-icon'));
}
It's actually the THEN and ELSE part of an IF statement.
Secondly, edit the file /lib/outputcomponents.php as per figure 5 below:
 |
| Figure 5. Insert a whole new function named link_lightbox() right after the original link() function. |
Here's that code again. The yellow highlighted code adds the needed attribute of rel="lightbox" into the URL link code.
/* Added by Frankie on 6th May 2015. */
public static function link_lightbox($url, $text, array $attributes = null) {
$attributes = (array)$attributes;
$attributes['href'] = $url;
$attributes['rel'] = "lightbox";
return self::tag('a', $text, $attributes);
}
/* End Frankie hack */
In essence, what I did was to call a new function named link_lightbox() whenever the program detected that an image file was being listed on screen. The link_lightbox() function has the code that injects the rel="lightbox" hyperlink attribute into the HTML rendered code. So, that's the 'trick'.
Now your image files inside the Moodle folder resource come to life on your screen. It took me quite a while to figure this out by tinkering with the code. This Reference Guide was invaluable in getting me to understand the code:
http://xref-diff.mukudu-dev.net/moodle26/_functions/link.htmlthis.
Hope you enjoy this Moodle 2.7.2 'novelty'. If you find this useful, why not post a comment below? Thanks for reading this.
Cheers,
Frankie Kam

No comments:
Post a Comment