Look no further. You need three things. And they are all free.
1. Use Virtualdub 1.9.11
2. with the deshaker 3.0 filter
(extract the Deshaker.vdf plugin file and copy it to the plugins folder of Virtualdub)
3. and the K-Lite Codec. After installing the codec pack, your PC should be able to play 99% of all videos on the Net.
To save you the trouble, you can download my zipped version VirtualDub 1.9.11, complete with the deshaker filter inside the plugins folder, here.
How to use Virtualdub and Deshaker filter to smoothen out the jerkiness of your videos
Step-by-Step Screenshots
Screen1: Open your shaky video first with File | Open video file.
Next, choose Videos | Filters
Next, choose Videos | Filters
Screen2: Click Add, then select the Deshaker 3.0 filter, followed by the OK button.
Screen3: Choose the Pass1 Section. Set the "Scale" and "Use Pixels" settings
Screen4: Process the output video. Depending on the size of your input video, it might take a while. So you might want to make yourself a cup of coffee or something.
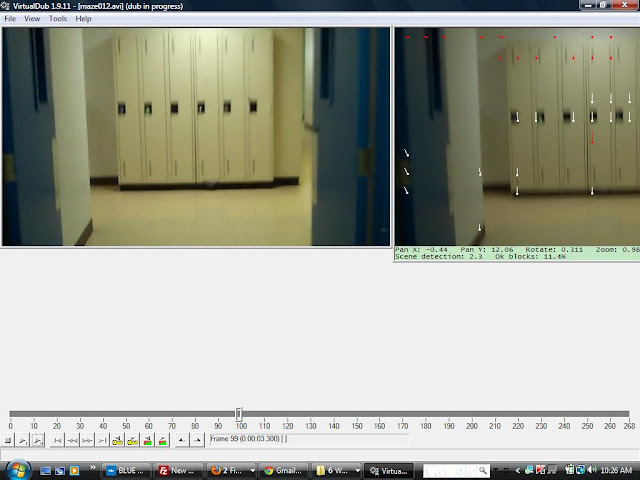
Screen5: Pass1 process in progress. Notice the red and white arrows?
Those are motion detection and compensation arrows. Computer Sciency stuff!
Those are motion detection and compensation arrows. Computer Sciency stuff!
Screen6: Pre-Pass2, click on Video | Filters
Screen7: Double-click on the Deshaker filter line to edit the settings
Screen8: Choose the Pass2 section. Set the "Resampling" and "Edge Compensation" settings.
Then click OK.
Then click OK.
Screen9: Click OK again.
Screen10: Choose your video compression code. Click on Video | Compression.
Screen11: Choose Xvid MPEG-4 codec for high compression (read: small video filesize)
Screen12: Save the output file as AVI.
Screen13: Type your video filename and click SAVE.
Screen14: Wait for Pass2 progress to complete. With Xvid MPEG-4 codec, this should be very quick.
At the end of the process, you will have a Deshaked video on your harddrive. You will either be very impressed or depressed by the outcome. I hope you will be impressed. So now you know. Go ahead, deshake some of your videos today. Add them into your Moodle course, set the multimedia plugin to detect the video type, and I am sure your students will thank you.
Frankie Kam
Addendum
(January 3rd 2011, erm, I mean 2012, heh!)
The default Mode value was -1 which gave some problems with MP4 files (playback was truncated and very jerky). So I changed it to Mode=0 and it worked fine with your MP4 files.
Addendum
(January 3rd 2011, erm, I mean 2012, heh!)
You may have noticed that deshaked videos differ from their original videos in this manner: the deshaked videos seem to have their edges clipped (truncated). Meaning that in deshaked videos, some of the original footage (especially the edges) are missing. Bah hambug! Probably due to the edge footage being overwritten by a black border.
Anyway, I've since discovered how to open MP4 files with Virtualdub (hooray!). However, you can only still save the output video file as AVI format (boo!). See below. All packed for you already.
I've uploaded this experimental version of Virtualdub 1.10.1 (taken from the Virtualdub download section) which is already MP4 and FLV enabled:
I've tested it and it opens and plays MP4 files no problemo. If you do encounter any problems, check the contents of the file Quicktime.ini (shown below):
[Settings]
color=-1
Mode=0
audio=1
quality=100
vtrack=1
atrack=1
gamma=2.5
fourcc=
Other than the missing edges in the output video, everything else seems to work fine.
See ya!
Frankie Kam


Thanks for going through the steps, Frankie. This is very helpful and will save me hours of tinkering.
ReplyDelete-Nick
Montreal